Add or Delete a Table Row in Microsoft Word
Modified:
05/03/2018
|
Software Use and Troubleshooting
|
#48010
Categories
Microsoft Office
>
Word
|
Add or Delete a Table Row in Microsoft Word
Question:
How do I delete or add a row in a table when using Microsoft Word?
Answer:
To add a row above an existing row:
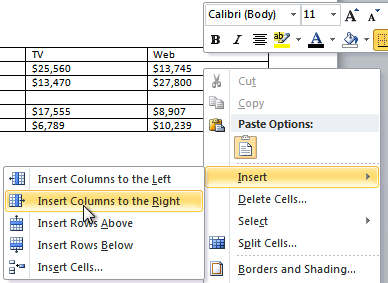
You can also add rows below the insertion point. Follow the same steps, but select Insert Rows Belowfrom the menu. To add a column:
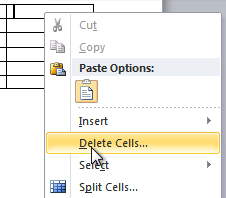
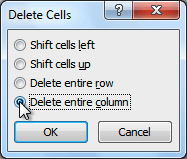
To delete a row or column:
Additional Information:
There is no additional information.
We welcome and appreciate your feedback!
Privacy Policy |
Website Terms and Conditions |
University of Phoenix Trademark Usage
Copyright © 2018 University of Phoenix |

 Insert Rows Above.
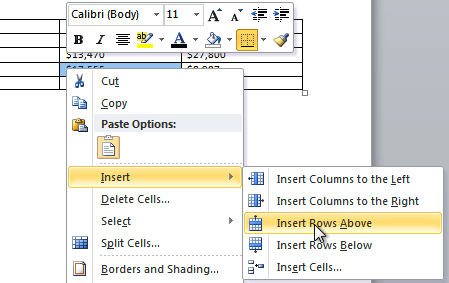

Subscribe
Enter your email address to receive a notification when the article is updated
Email Address