You can schedule a synchronous meeting with an individual student or multiple students in your course. Maximum webcams allowed to share is 7, but as many as 50 students can participate (without webcams) in the meeting. You can meet for office hours or to discuss a paper or a project. Documents can be uploaded and previewed during the meeting.
Note: The YouSeeU system defaults to Pacific Standard Time (PST) when scheduling. Please clarify the potential time zone differences with your committee members.
To schedule the meeting, perform the following:
- Access a Learning Activity from your course syllabus that uses YouSeeU
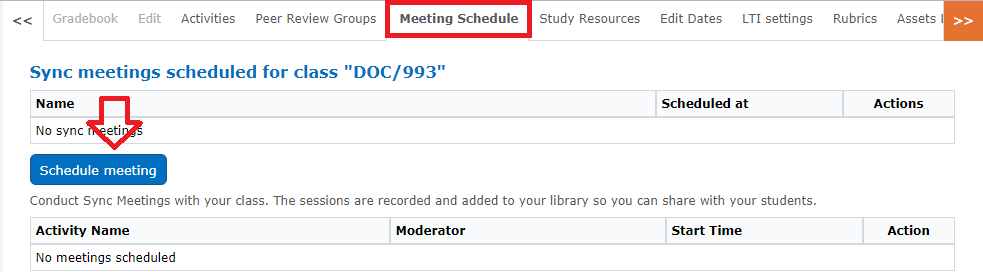
- Click the Meeting Schedule tab
- Click Schedule meeting. Sync Meetings are always scheduled a minimum of 30 minutes out:
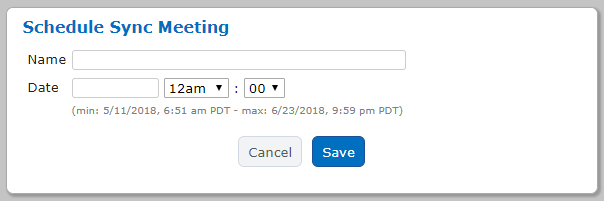
- Fill out the fields for Name, Date, and time clicking Save when done
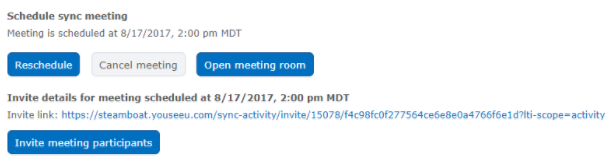
- After you have scheduled your meeting, you will have the option to invite participants, enter the meeting, cancel the meeting, or reschedule.
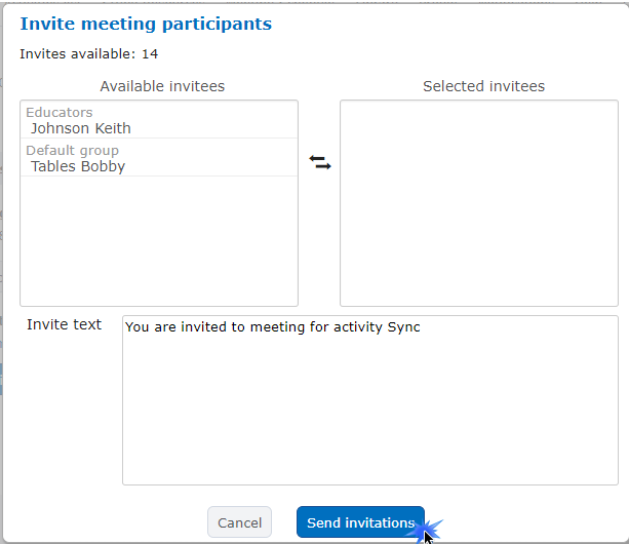
- If you click Invite meeting participants, you will be given a list of your classmates. You can then drag and drop the name to the Selected invitees list. You also have the option to change the text for the invite. Then click Send Invitations.
Note: Please review a short overview video on how to enter the meeting including some basic settings:
Sync Meeting/Sync Activity Overview Video (HTML5)
To access a Sync Meeting Invitation, perform the following;
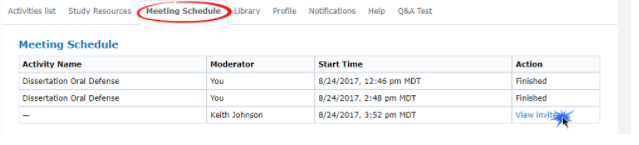
- To view and accept the invitation, you will first need to click on Meeting Schedule at the top of the screen.
- Once there, you will need to click View invite.
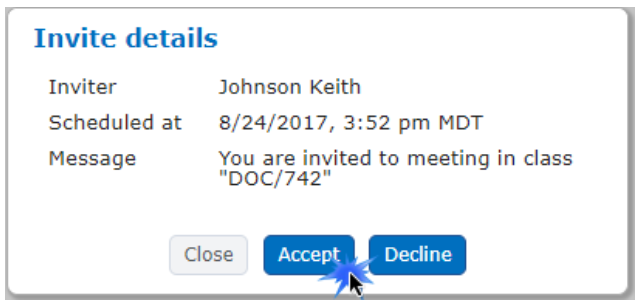
- Once you are viewing the invite you will choose to Accept or Decline the invitation. Choose Accept to access the meeting.
- Once you have accepted the meeting, you will be able to join. When you join the meeting, you will be taken to the meeting lobby page.

Note: The meeting is automatically recorded. Recording begins when you enter the meeting room. However,clicking the
Record button sets Start and End points for the resulting recording. These recordings are saved in your Educator Library. Within the meeting room, you will see:
- If you cancel the meeting, you will be given the option to schedule a new meeting. You can also reschedule the current meeting to a new date/time. If you click Open meeting room you will be taken to the meeting lobby page.
- If you can see the Invite link, then you have the option to invite outside participants. You will need to send them the Invite link for them to access the meeting.
- As of 4/2/2017 Faculty will have two options for their meeting content to be displayed: Enter Meeting Room is Flash-based and Enter Meeting Room (New & Improved) is HTML5-based.
- For the DOC courses, the Flash-based option is recommended, as all instructions posted in New Classroom and YouSeeU focus on the Flash version
- Students will access the meeting by clicking on the system message icon (envelope in the upper left of the toolbar) and the message received by you. They will click on the link to be taken to the invite and will need to accept the invite.
- Once you’ve reviewed the Lobby Page guidelines and your meeting is ready to begin, click Enter Meeting Room. Pay close attention for the browser permissions particularly when testing your mic and webcam .
- Users: those participating in the meeting
- Webcams: those sharing their webcams
- Share Desktop: this allows for desktop sharing between participants
- Presentation: power points and other documents can be uploaded for others to view.
- Chat: participants can chat with the group or an individual participant

- You can lock the participants’ settings by clicking on the Setting icon:


- You can upload PowerPoint presentations and Word documents and assign presenter rights to other participants by dragging and dropping the presenter icon. To upload a power point or document, simply click the Upload Presentation button:

- Choose the appropriate file from your computer and click Upload:

- You can upload PowerPoint presentations, PDFs, image files, Word documents, and Excel documents, however, PDFs are preferred. Documents will be presented in 8 1/2 x 11 portrait so be cautious of formatting issues particularly with Excel. Once the documents are uploaded, use the arrow button to sync the visual aids with your commentary. Click the upload presentation button located on the lower left side at any time to access other visual aids you uploaded and click Show.
- Once the meeting has concluded, click on the door icon to exit the meeting

- A recording of the meeting will be available in your Library after the video has been processed.